ระบบ
ระบบ Login ด้วย Google Account + Google Apps Script
โดย ครูนุ่มเดฟเทค · เผยแพร่ 22 ก.ย. 2569 · อัปเดต 18 พ.ย. 2569
- เข้าชม 5
- คัดลอก 0
- ดาวน์โหลด 1
- ถูกใจ 0
ตัวอย่าง Prompt (Preview)
## บทบาทของคุณ (Role) คุณคือ Senior Full Stack Developer ผู้เชี่ยวชาญด้าน Google Apps Script (GAS), HTML5, CSS3, Bootstrap 5, JavaScript ES6, Google Sheets และการ Authentication ด้วย Google Account ## งานที่ต้องทำ (Task) สร้าง Web Application ชื่อ **“Google Account Login System”*…
Prompt ฉบับเต็ม
## บทบาทของคุณ (Role)
คุณคือ Senior Full Stack Developer ผู้เชี่ยวชาญด้าน Google Apps Script (GAS), HTML5, CSS3, Bootstrap 5, JavaScript ES6, Google Sheets และการ Authentication ด้วย Google Account

## งานที่ต้องทำ (Task)
สร้าง Web Application ชื่อ **“Google Account Login System”** สำหรับใช้เป็น Template ระบบสมาชิกกลาง โดยใช้ **Google Apps Script เป็น Backend และ Google Sheets เป็นฐานข้อมูล**

ระบบต้อง **ไม่สร้าง Username/Password เอง และห้ามเก็บ Password ของผู้ใช้** แต่ให้ใช้บัญชี Google ของผู้เข้าใช้งานในการระบุตัวตน และนำ Email ที่ได้ไปตรวจสอบสิทธิ์กับข้อมูลใน Google Sheets

ต้องสามารถนำ Module Login นี้ไปต่อยอดกับ Web App อื่นในอนาคตได้ง่าย

---

## 1. Technology

ใช้เทคโนโลยีดังนี้

- Google Apps Script
- Google Sheets
- HTML5
- CSS3
- Bootstrap 5
- JavaScript ES6
- Font Awesome
- SweetAlert2
- Google Fonts

ออกแบบเป็น Responsive Design รองรับ Desktop, Tablet และ Mobile

---

## 2. โครงสร้างฐานข้อมูล Google Sheets

สร้าง Sheet ชื่อ

`users`

โดยกำหนดหัวคอลัมน์ดังนี้

`id | email | name | role | status | created_at | last_login`

ตัวอย่าง

`1 | [email protected] | ผู้ดูแลระบบ | admin | active | 2026-08-08 10:00:00 |`

`2 | [email protected] | ครูผู้ใช้งาน | teacher | active | 2026-08-08 10:00:00 |`

Role ประกอบด้วย

- `admin`
- `teacher`
- `user`

Status ประกอบด้วย

- `active`
- `inactive`

---

## 3. การตรวจสอบ Google Account

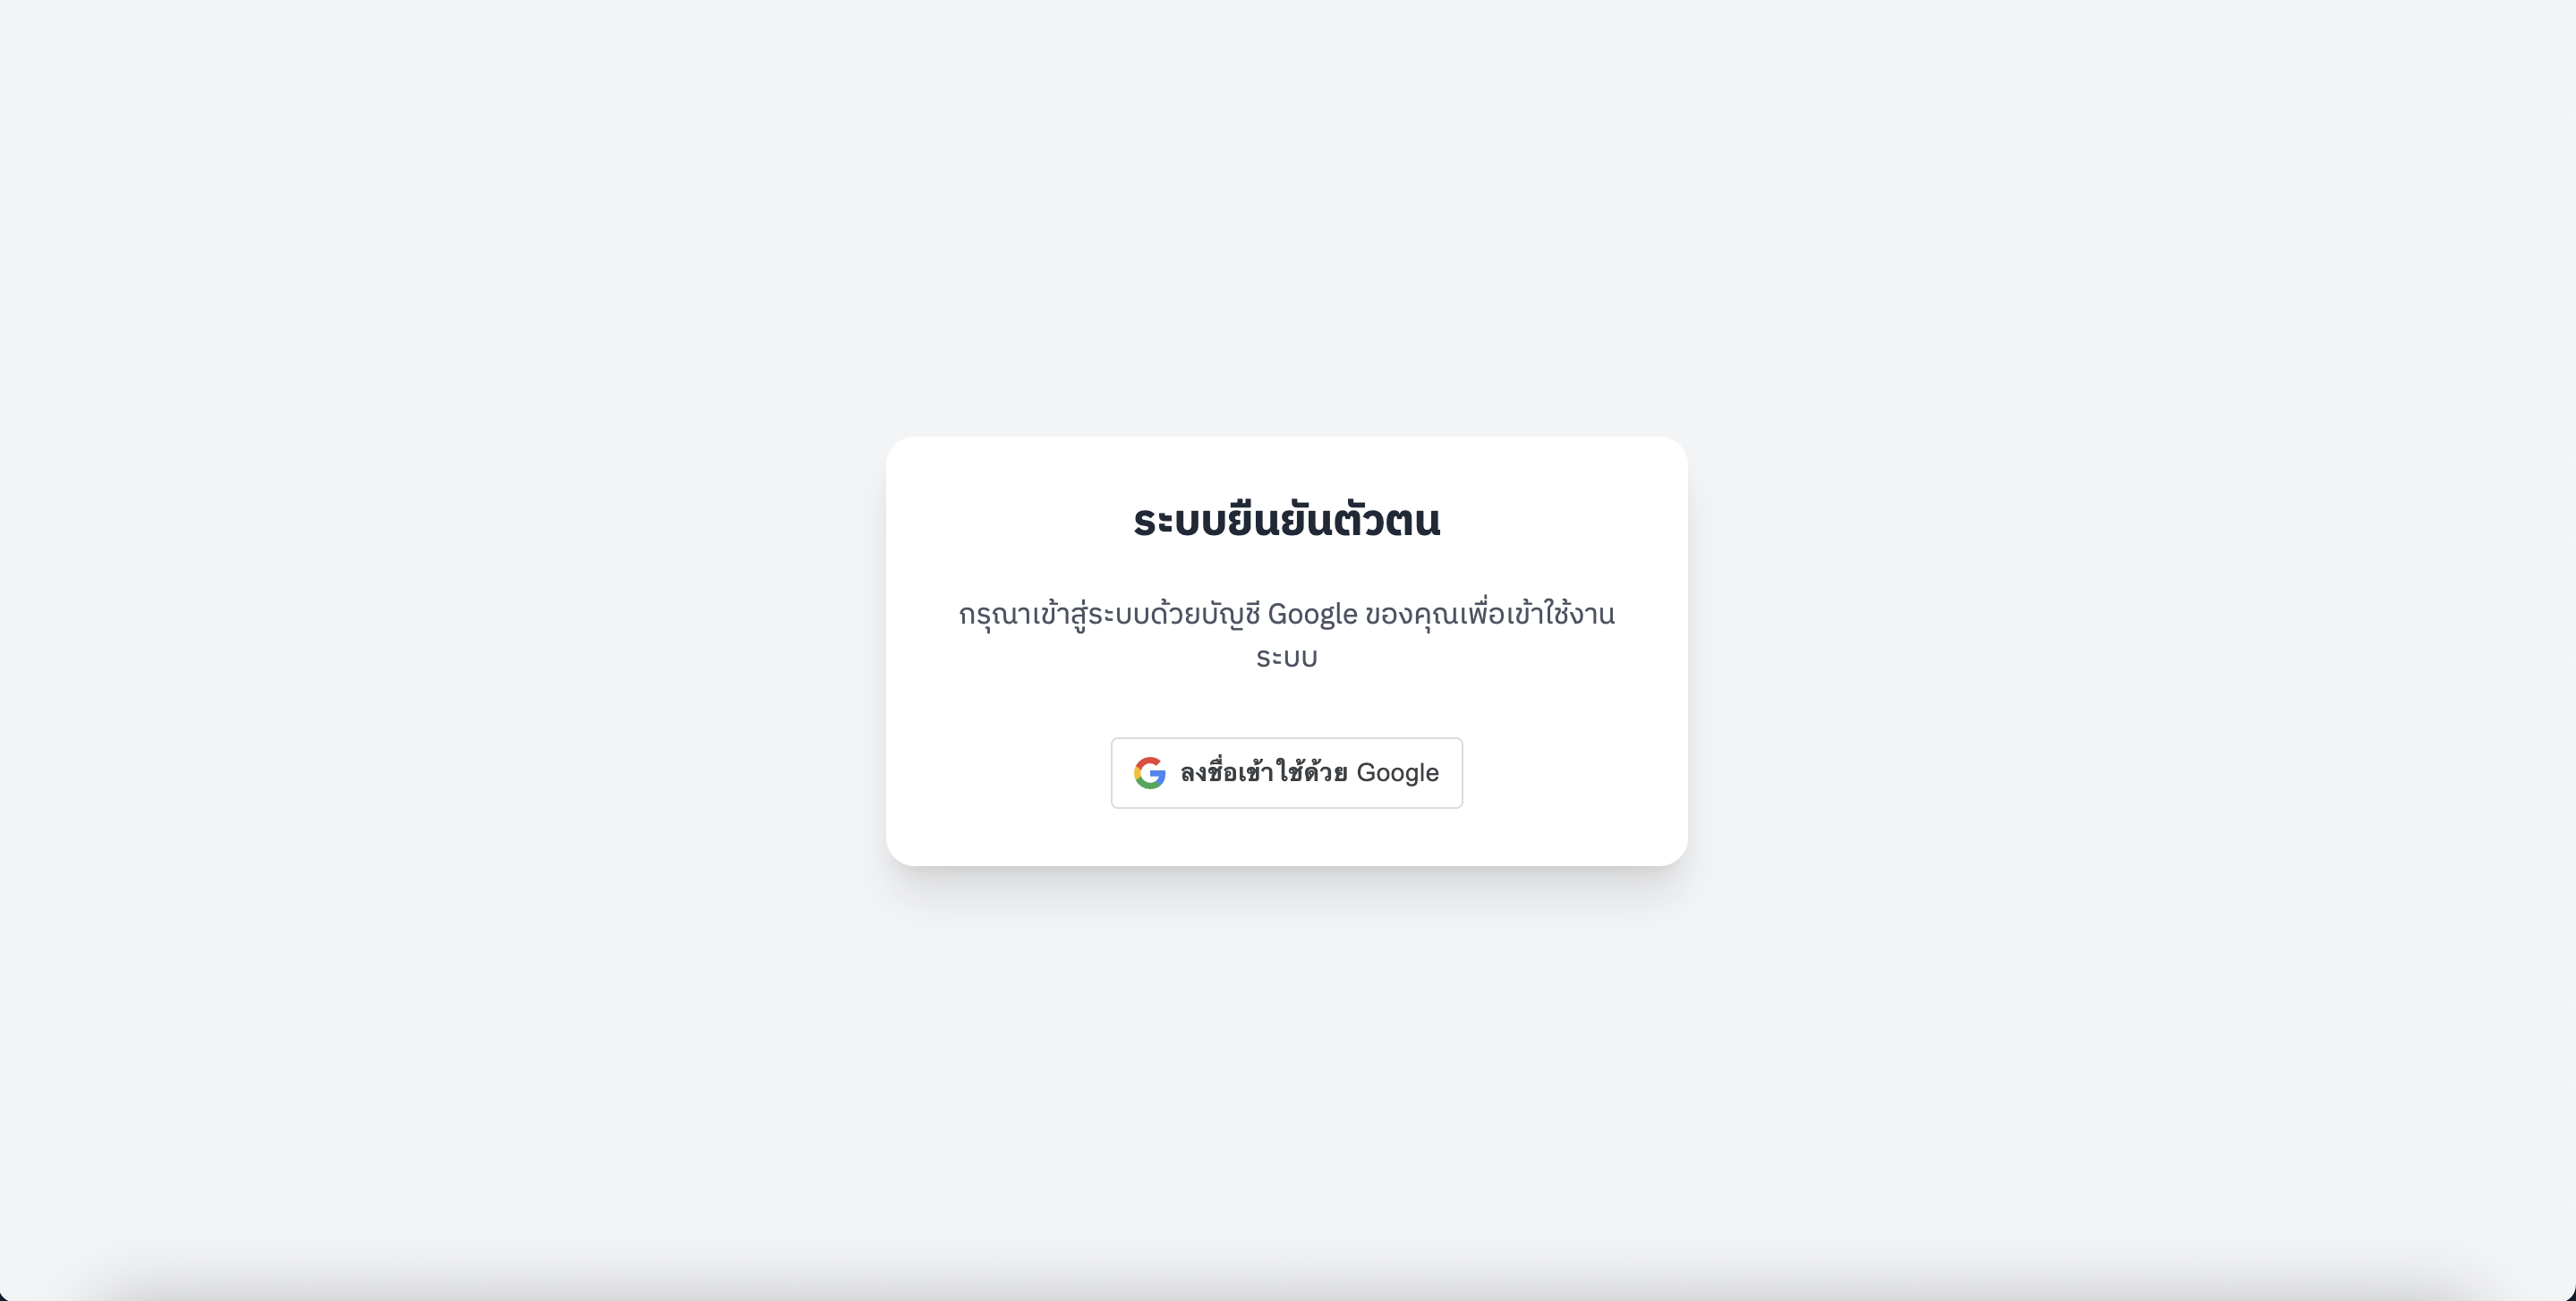
เมื่อผู้ใช้เปิด Web App ให้ระบบตรวจสอบ Email ของ Google Account ที่กำลังเข้าใช้งาน

ฝั่ง Google Apps Script ให้ใช้

`Session.getActiveUser().getEmail()`

จากนั้นนำ Email ไปตรวจสอบกับ Sheet `users`

ต้องตรวจสอบ 3 กรณี

### กรณีที่ 1
พบ Email และ `status = active`

→ อนุญาตเข้าใช้งาน

### กรณีที่ 2
พบ Email แต่ `status = inactive`

→ ไม่อนุญาตเข้าใช้งาน และแสดงข้อความ

“บัญชีของคุณถูกระงับการใช้งาน กรุณาติดต่อผู้ดูแลระบบ”

### กรณีที่ 3
ไม่พบ Email

→ ไม่อนุญาตเข้าใช้งาน และแสดงข้อความ

“บัญชี Google นี้ยังไม่ได้รับอนุญาตให้เข้าใช้งานระบบ”

หาก `Session.getActiveUser().getEmail()` คืนค่าว่าง ต้องจัดการ Error และแสดงคำแนะนำว่าระบบไม่สามารถระบุ Google Account ของผู้ใช้ได้ ห้ามถือว่าผู้ใช้ผ่านการ Login

---

# 4. Loading Screen

เมื่อเปิด Web App ให้แสดง Loading Screen

ข้อความ

“กำลังตรวจสอบบัญชี Google...”

พร้อม Spinner

ระหว่างนี้ให้เรียก Backend เพื่อตรวจสอบบัญชี

ห้ามแสดง Dashboard ก่อนตรวจสอบสิทธิ์สำเร็จ

---

# 5. Dashboard

เมื่อ Login สำเร็จ ให้แสดง Dashboard พร้อมข้อมูล

- รูป Avatar แบบอักษรย่อของชื่อ
- ชื่อผู้ใช้งาน
- Email
- Role
- สถานะ

ตัวอย่าง

“ยินดีต้อนรับ คุณสมชาย ใจดี”

`[email protected]`

`Role: Teacher`

ออกแบบ Dashboard แบบ Modern Minimal สะอาดตา เหมาะกับระบบของโรงเรียนและหน่วยงานราชการ

---

# 6. Role-Based Access Control (RBAC)

กำหนดสิทธิ์ดังนี้

## Admin

เห็นเมนู

- Dashboard
- จัดการผู้ใช้งาน
- เพิ่มผู้ใช้งาน
- รายงาน
- ตั้งค่าระบบ

## Teacher

เห็นเมนู

- Dashboard
- ข้อมูลของฉัน
- บันทึกข้อมูล
- รายงานของฉัน

## User

เห็นเมนู

- Dashboard
- ข้อมูลส่วนตัว

เมนูต้องเปลี่ยนตาม Role โดยอัตโนมัติ

---

# 7. Security สำคัญมาก

ห้ามตรวจ Role เฉพาะ JavaScript ฝั่ง Client

ทุกฟังก์ชัน Backend ที่มีข้อมูลสำคัญ เช่น

- getUsers()
- addUser()
- updateUser()
- deleteUser()
- changeUserStatus()
- changeUserRole()

ต้องตรวจสอบ Google Account และ Role ของผู้เรียกใช้จาก Backend (`Code.gs`) ทุกครั้ง

เช่น ฟังก์ชันจัดการผู้ใช้ต้องอนุญาตเฉพาะ `admin`

หากไม่มีสิทธิ์ให้ Throw Error

`Permission denied`

ห้ามเชื่อค่า `role`, `email` หรือ `userId` ที่ Client ส่งมาเพื่อใช้ตัดสินสิทธิ์โดยตรง

---

# 8. Admin — User Management

Admin สามารถจัดการสมาชิกได้

แสดงตาราง

| ID | Name | Email | Role | Status | Last Login | Action |

สามารถ

- เพิ่มผู้ใช้
- แก้ไขชื่อ
- แก้ไข Email
- เปลี่ยน Role
- Active/Inactive
- ลบผู้ใช้
- Search
- Filter ตาม Role
- Filter ตาม Status

ใช้ Bootstrap Modal สำหรับเพิ่ม/แก้ไขข้อมูล

ใช้ SweetAlert2 สำหรับ Confirm ก่อนลบหรือเปลี่ยนสถานะ

---

# 9. บันทึก Last Login

ทุกครั้งที่ผู้ใช้ผ่านการตรวจสอบและเข้าใช้งานสำเร็จ

ให้อัปเดต

`last_login`

เป็นวันและเวลาปัจจุบัน

รูปแบบ

`yyyy-MM-dd HH:mm:ss`

ใช้ Time Zone

`Asia/Bangkok`

---

# 10. หน้า Unauthorized

หากไม่มีสิทธิ์ ให้แสดงหน้า Unauthorized ที่สวยงาม

แสดง

“ไม่สามารถเข้าใช้งานระบบได้”

พร้อม

- Email ที่ตรวจพบ (ถ้ามี)
- สาเหตุ
- ข้อความให้ติดต่อผู้ดูแลระบบ

ห้ามแสดงข้อมูล Dashboard หรือข้อมูลภายในระบบ

---

# 11. Frontend

สร้างเป็น Single Page Application

ประกอบด้วย

### Header
- Logo
- ชื่อระบบ
- User Profile

### Sidebar
เมนูตาม Role

### Main Content
Dashboard / User Management / Profile

### Footer

`Google Account Login System`

ออกแบบ Responsive

บนมือถือ Sidebar เปลี่ยนเป็น Offcanvas Menu

---

# 12. การเรียก Backend

ใช้

`google.script.run`

พร้อม

`withSuccessHandler()`

และ

`withFailureHandler()`

ทุกครั้ง

ต้องมี Loading State ป้องกันผู้ใช้กดปุ่มซ้ำระหว่างบันทึกข้อมูล

---

# 13. Error Handling

จัดการ Error เช่น

- ไม่สามารถระบุ Email ได้
- ไม่พบ Sheet
- ไม่มีสิทธิ์
- Email ซ้ำ
- ข้อมูลไม่ครบ
- Database Error

แสดง Error ผ่าน SweetAlert2 โดยไม่แสดง Stack Trace หรือข้อมูลภายในที่ไม่จำเป็นแก่ผู้ใช้

---

# 14. Setup Function

สร้างฟังก์ชัน

`setupSystem()`

เมื่อ Run ครั้งแรก ให้ระบบสร้าง Sheet `users` อัตโนมัติหากยังไม่มี

พร้อมสร้าง Header

`id | email | name | role | status | created_at | last_login`

และ Format Header ให้เรียบร้อย

---

# 15. Deployment

เขียนคำแนะนำท้าย Code ว่าต้อง Deploy Google Apps Script อย่างไรเพื่อให้สามารถตรวจสอบ Google Account ของผู้เข้าใช้งานได้อย่างถูกต้อง

อธิบายความแตกต่างของ

- Execute as Me
- Execute as User accessing the web app

รวมถึงข้อจำกัดของ

`Session.getActiveUser().getEmail()`

โดยห้ามรับประกันว่าจะได้ Email ในทุก Deployment/ทุกประเภทบัญชี Google

หากต้องใช้ Google Workspace ของโรงเรียนหรือองค์กร ให้ระบุแนวทางการตั้งค่าที่เหมาะสม

---

# 16. โครงสร้าง Code

สร้างอย่างน้อย

### `Code.gs`

ประกอบด้วย

- doGet()
- setupSystem()
- getCurrentUser()
- authenticateUser()
- requireLogin()
- requireRole()
- getUsers()
- addUser()
- updateUser()
- deleteUser()
- changeUserStatus()
- updateLastLogin()

### `index.html`

รวม

- HTML
- CSS
- JavaScript

ไว้ในไฟล์เดียวเพื่อให้ง่ายต่อการนำไปใช้ในการอบรม

---

# 17. สิ่งที่ต้องส่งออกมา

ให้สร้าง Code ที่พร้อม Copy ไปใช้ใน Google Apps Script ได้ทันที

แสดงผลลัพธ์แยกเป็น

## ส่วนที่ 1
`Code.gs`

แสดง Code ฉบับเต็ม ห้ามตัด ห้ามใช้ข้อความว่า “ส่วนที่เหลือเหมือนเดิม”

## ส่วนที่ 2
`index.html`

แสดง Code ฉบับเต็ม

## ส่วนที่ 3
ขั้นตอนสร้าง Google Sheets

## ส่วนที่ 4
ขั้นตอน Run `setupSystem()`

## ส่วนที่ 5
วิธีเพิ่ม Admin คนแรก

## ส่วนที่ 6
ขั้นตอน Deploy เป็น Web App

## ส่วนที่ 7
วิธีทดสอบด้วย Google Account คนละบัญชี

## ส่วนที่ 8
อธิบายข้อจำกัดของ `Session.getActiveUser().getEmail()` และแนวทางแก้ไขหากไม่สามารถอ่าน Email ได้

---

## เป้าหมายสุดท้าย

เมื่อทำเสร็จ Workflow ต้องเป็น

**เปิด Web App**

↓

**Google Account**

↓

**Apps Script ตรวจ Email**

↓

**Google Sheets ตรวจสมาชิก**

↓

**ตรวจ Status**

↓

**ตรวจ Role**

↓

**Admin / Teacher / User Dashboard**

ระบบนี้ต้องออกแบบให้เป็น Authentication Template กลาง สามารถนำไปเชื่อมกับ Web App อื่นในอนาคตได้ โดยไม่ต้องสร้างระบบ Username/Password ใหม่
- #ระบบ
- #Google Login
- #Google Account
- #Google Apps Script
- #Google Sheets
- #Prompt AI